Rows

Full Width
Grid

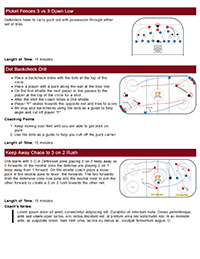
Cheat Sheet
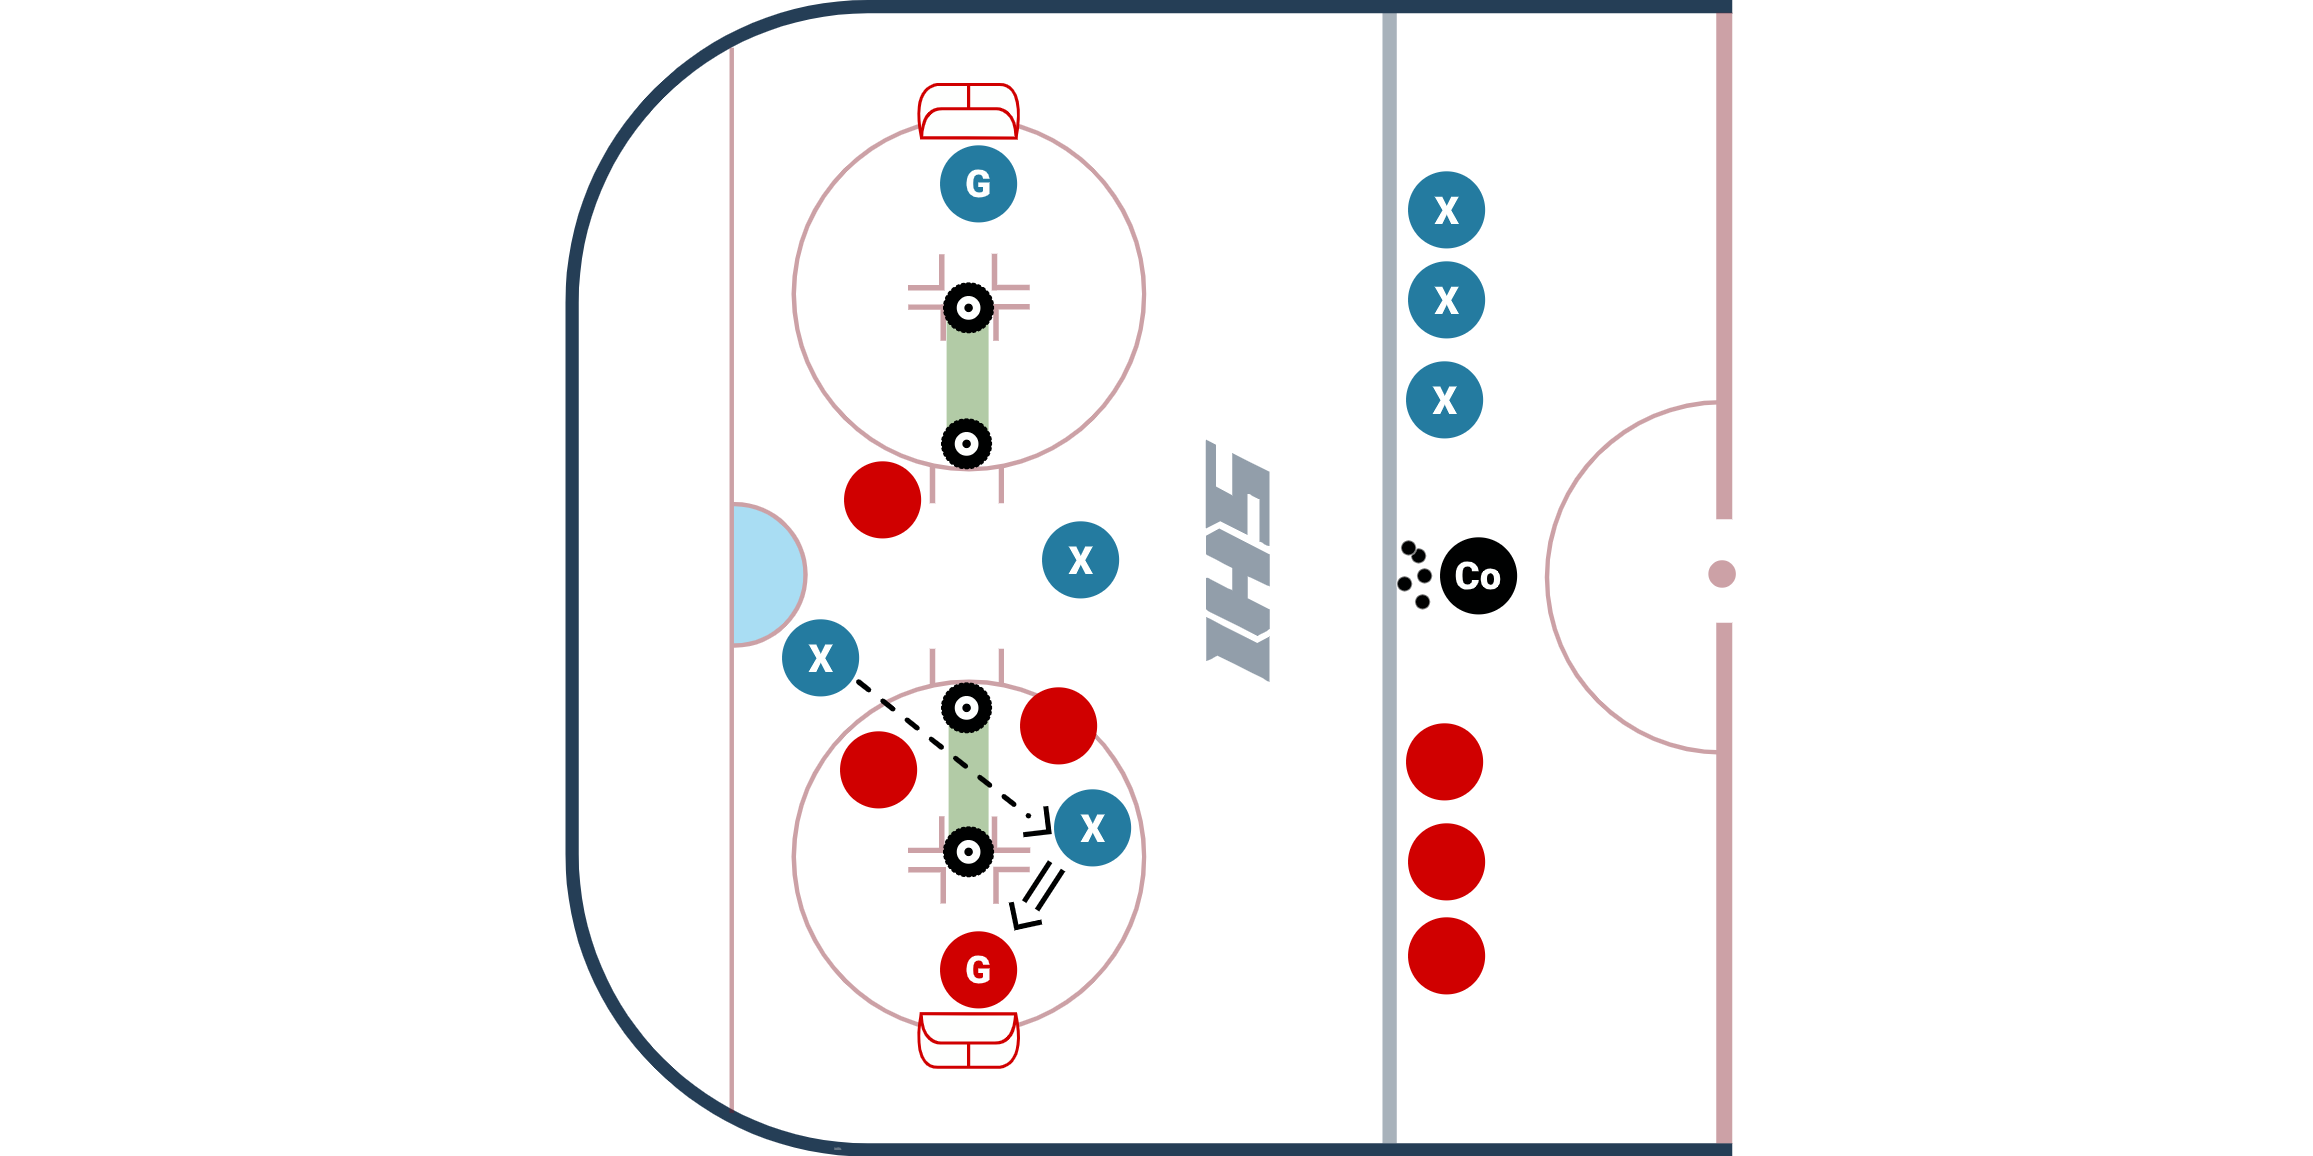
Decision Making Stations
Decision Making Stations
Please Note: The Practice of the Week is usually designed to be utilized across multiple age levels. With that being said, we highly encourage you to adjust the drills based on your team's age and skill levels. These drills and practices can be modified to become more basic or more advanced.
Practice Theme: The drills & games in this practice are designed to help your players develop decision making in a fun and competitive manner.
Key Teaching Points:
- Communicate with teammates - using verbal and non-verbal cues helps your teammates make informed decisions
- Practice keeping your head up - this will allow your players to scan and process the surrounding environment to make more informed decisions

Adding Decisions & Cues to Practice
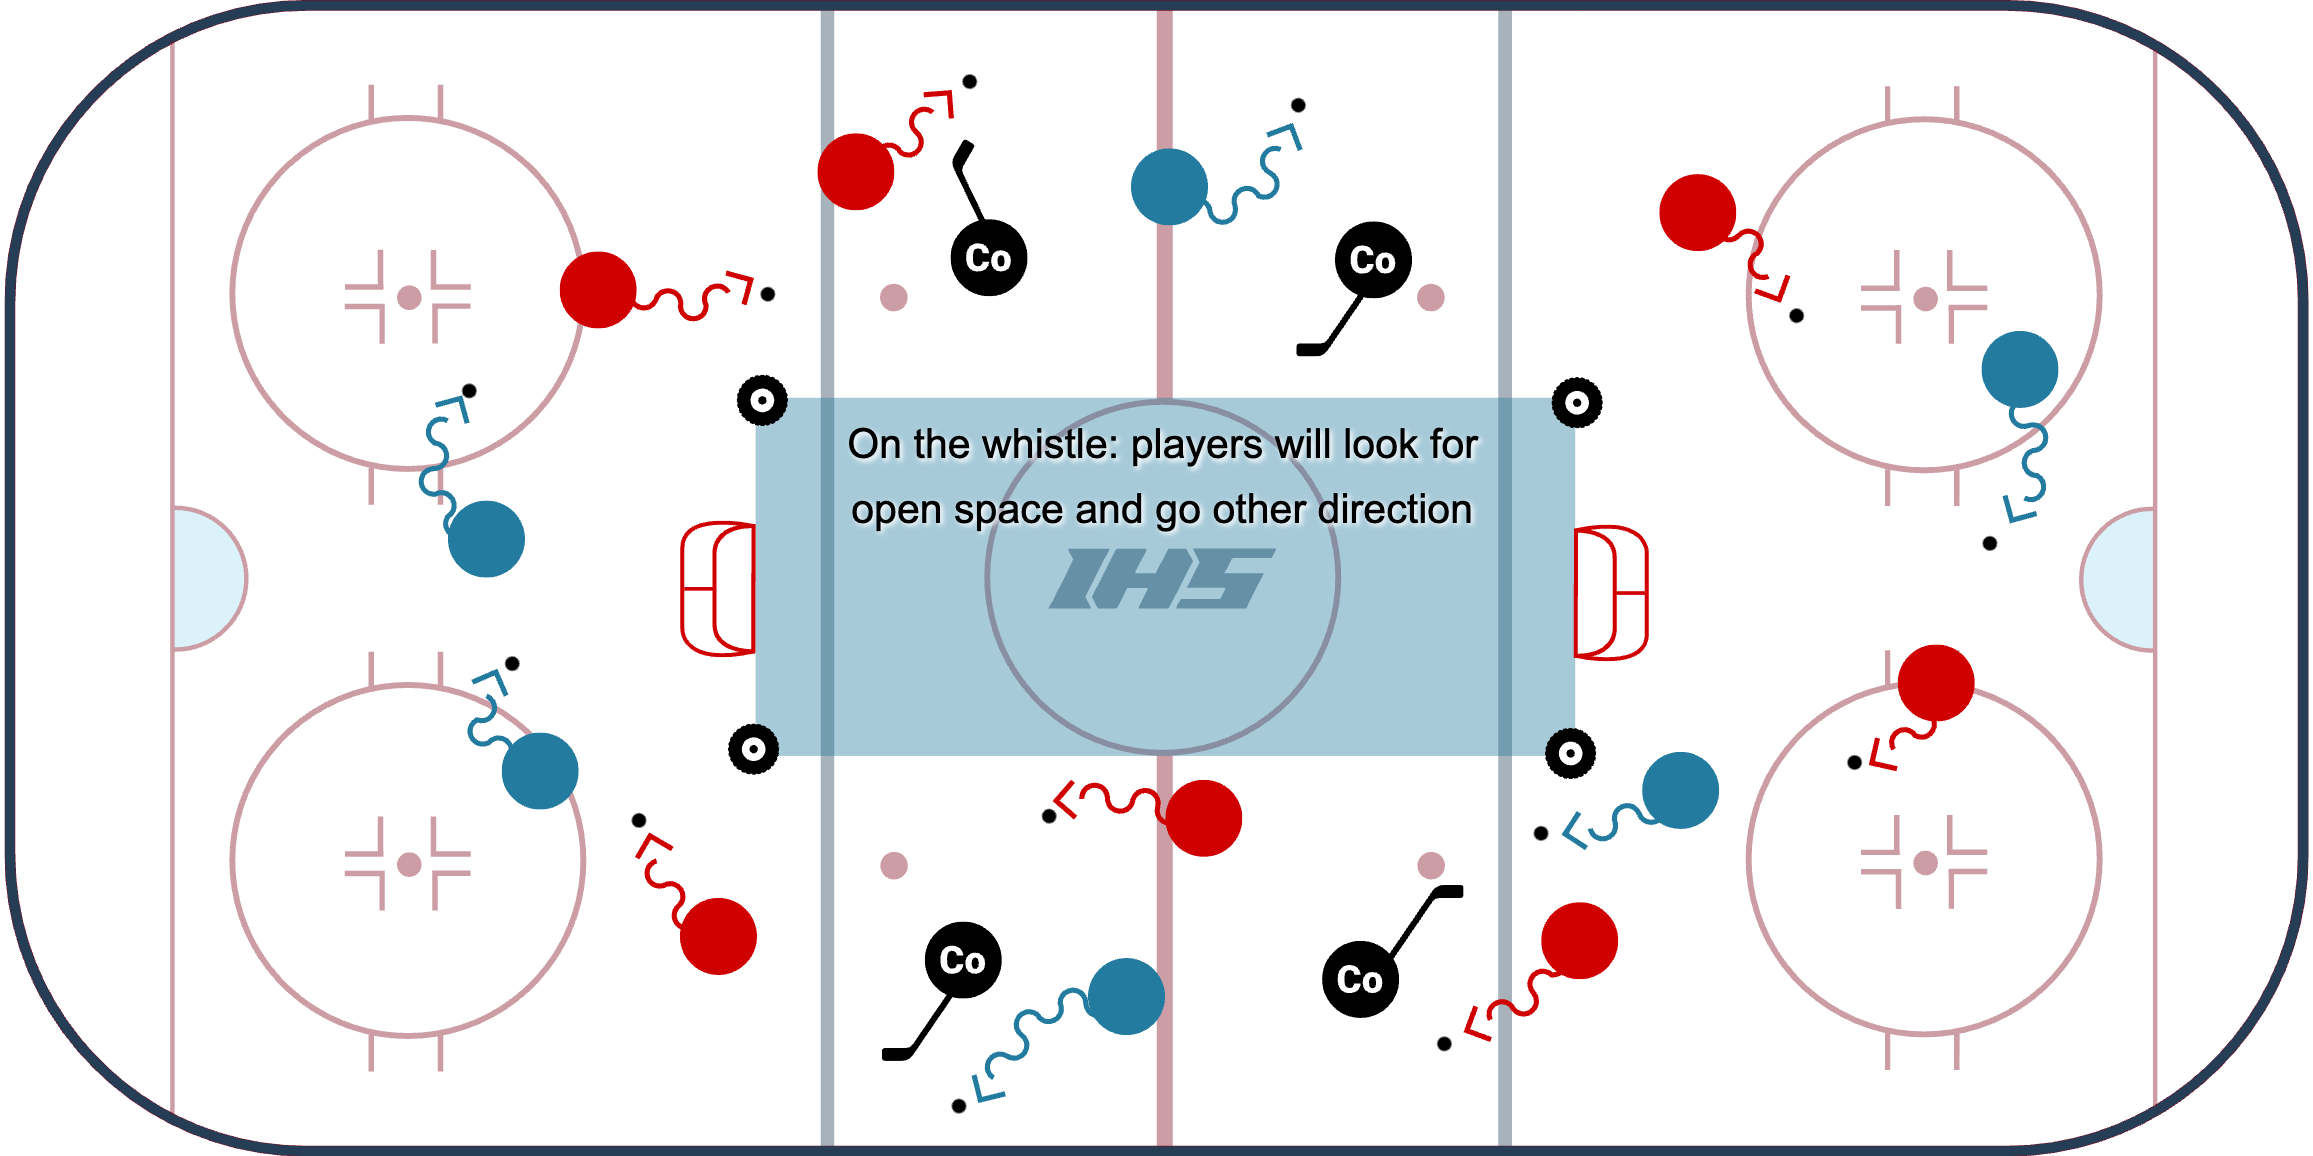
Head Up Scan The Ice Warm-Up
The Head-Up Scan The Ice Warm-Up from Dwayne Blais of the NSDA is a simple yet highly effective warm-up drill that is great for all age levels. The goal of this warm-up activity is to get players in the habit of keeping their head up while they stickhandle so they can look for open ice and evade obstacles.
Setup
- Can be set up to be full-ice (like it is shown in the video) or half-ice.
- On the whistle, all players skate in the same direction.
- On the next whistle, players check their shoulders and turn to go in the opposite direction.
- Coaches can add obstacles (cones, sticks, tires) that players must stickhandle around, and coaches can also be obstacles (like shown in the video).
Coaching Points
- Players should practice keeping their head up!
- Players must shoulder check and look over their shoulder to determine where the open ice is.
- Coaches should encourage players to keep their head up as much as possible during practice. Players can't keep their head up in the game if they do not learn the skill at practice!
Variations
- Can be full ice, half ice, or in zone setup.
- The coach can blow the whistle to change directions every 10 - 20 seconds for younger age groups or every 3 - 5 seconds for higher-skilled groups.
- Can add obstacles and / or defenders that players need to be aware of and stickhandle around.
Finnish 5 Puck Progression
In this video, Ben Eaves explains a hockey activity and progression that is excellent for every age and skill level. The activity can be done with 3, 4 or 5 players at a time. The video above shows two groups going through the progression. Group # 1 consists of 4, U18 players and Group # 2 is made up of 5, U10 & U12 players.
The major concept of the Finnish 5 Puck is to practice dynamic decision making which will help players learn to play with their head up instead of staring at the puck while they work to memorize a drill. The initial activities are set up to warm up your hands and edges. From there, the activities become more complex as more decisions need to be made within the group. Each Activity encourages players to keep their head up, move to open space, and pass the puck by interacting with their teammates through verbal & non-verbal communication.
If you commit to working on activities like this instead of memorization drills for a portion of each practice, you will marvel at how your team begins to work together. It will look extremely messy at first, but players will get better with each repetition. Moving to open space, and moving the puck will eventually become second nature to the team.
SETUP & ACTIVITY VARIABLES
- Players: great for 3, 4 or 5 players at a time.
- Time: You can rotate through groups of players in 45 - 60 second shifts. 5 players can be participating in the activity, while another 5 rest. Blow the whistle and the next 5 jump in.
- Space: can be set up to be within a zone, or half of a zone (station) or a smaller area. The smaller the space, the more challenging it will be for the players as they are forced to make quicker decisions.
- Added Challenge: add obstacles within the space to challenge the players further. Tires, cones, sticks, etc placed in the space make it harder to pass and skate around. As time goes on the added obstacles will help improve their reaction & decision making.
Activity # 1: Forward Skating
The goal of this activity is to get players warmed up and comfortable with skating forward to open space with the puck. They should be keeping their head up so they do not run into anyone or any obstacles that are out in the playing area. Players can work on their edges, control turns, mohawk turns, dekes, changing pace and whatever their creative minds (and coaches) can think of!
Activity # 2: Backward Skating
The goal of this second activity is to get players comfortable with skating backwards with the puck to open space. Since players are skating backward, it is crucial that all players keep their head up and look over their shoulders at all times.
Activity # 3: Forehand Only Puck Control
In this activity, players can only stickhandle with their forehand. This encourages players to move their body around the puck. This will help with puck protection along with changing passing and shooting angles. Continue to encourage players to keep head up and move to open space!
Activity # 4: Pass 1 Puck
Now that everyone is warmed up, this is where the fun begins. Encourage players to use verbal and non-verbal communication to pass 1 puck around between the group of players in the activity. Do not let players stand still and pass back and forth. Call out for constant movement and to skate to open space. When players receive the puck, they should take a stride or two, have their head up, and make a pass to an open teammate.
Activity # 5: Pass 2 Pucks
Here we go! With two pucks it is even more critical to keep your head up and communicate. It is important for all players to have an idea of where both pucks are so they can be ready to receive a pass and be ready to make a pass without passing to someone who already has a puck.
Activity # 6: Pass 3 Pucks
With three pucks it is important to read your teammates and anticipate what they are going to do with the puck. If you don't pay attention, you end up receiving a pass you are not ready for, or you pass to someone who isn't looking. Communicate verbally, pay close attention and read body language!
Activity # 7: Pass 4 Pucks
This could be the hardest of all of the activities. It is important to stress patience with the puck in this round. If players do not pay attention they end up all passing to the one open player at once. Keep your head up, be patient and pass when your teammate is ready to receive your pass. Do not rush. If you are the only player without a puck, make it clear with verbal communication who you want the puck from.
Activity # 8: Pass 5 Pucks
With 5 pucks (or 4 pucks with 4 people) it is important to communicate with eye contact and verbal queues. Do not attempt rink-wide or long passes at first. Short and subtle drop passes and slides work excellent in this activity.
Activity # 9: 4 vs 1
Now that everyone has been challenged with passing multiple pucks, it should be extremely easy to pass one puck and keep it away from a defender. Use all of the lessons learned above (moving to space, verbal and non-verbal communication) to make sure that the defender does not have a chance to touch the puck.
Activity # 10: 3 vs 2
3 on 2 will be an increasing challenge to play keep away, but with patience, puck protection and communication, the defenders should still not be able to get the puck.
Added Competitive Challenge:
- Group Challenge: After the group gets comfortable with the exercises, you can add a natural element of competition between the groups by counting the number of successful passes made in the passing activities. Or you can count the number of successful passes made in a row. Either of these can be a fun way to get each group to work harder by having them compete with each other and focus on getting open and making a good pass.
- With a Goalie: when you are playing 4 on 1 or 3 on 2, if the team makes 5 passes in a row you can allow them to shoot on a goalie.
Coaching Points:
- Encourage players to always move to open space on the ice. Do not allow them to stand still and pass the puck back and forth.
- Encourage verbal communication (calling teammate by name, saying you are open, etc).
- Encourage non-verbal communication (good eye contact, showing a passing target, tapping a stick, etc).
- Allow players to make mistakes. It will take time to get comfortable with these activities. But as time goes on you will see them picking their head up to make a decision, which is the goal of this progression.
If you are interested in more hockey activities which require more decision making, reading, and reacting then please check out this article which discusses 11 Activities for Youth Hockey Practice.
Related Content

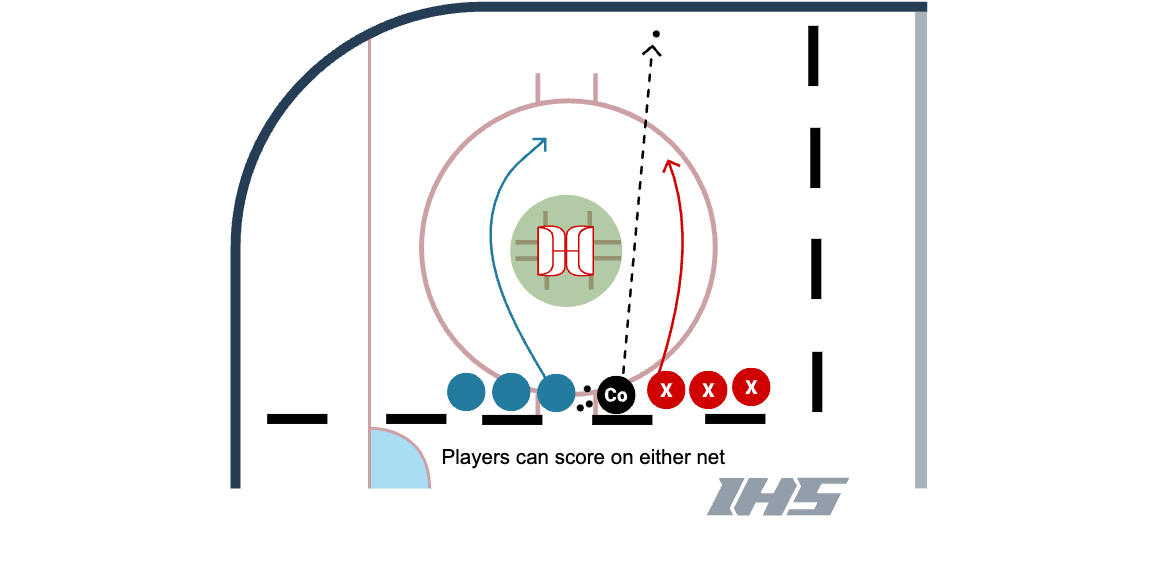
Back to Back 1 vs 1 with Mini Nets
This is a really good battle drill where players work on puck protection in a tight space. This game was first posted on Twitter by Dave Breen (view video here).
Setup
- Create a small space using borders and the wall as shown in the diagram. Place two mini nets back to back in the center of the playing area. The coach has the pucks between the two lines of players.
How to Play
- The coach dumps a puck into the playing area and one player from each line competes for the puck. Players are allowed to score on either net. If a player scores the coach plays a puck into the playing area right away. Allow players to play for 30 - 40 seconds.
Variations
- Can use 2 mini nets, 2 large nets, or even just one tire!
- Only allow the players to score on a certain net.
- Make the game 1v1 or 2v2.
- Modify the playing area.
- Add goalies.
Tic Tac Toe Relay
Tic Tac Toe Relay
Split up players into two teams. Have 4 of the players place their sticks down, in the shape of a Tic Tac Toe board. The rest of the players can place their sticks off to the side.
Set up a small "obstacle" course based on the skill you're working on (i.e. balance, edges, tight turns, etc.). On the whistle, one player from each team starts with their team object (e.g. puck, tennis ball, cone, etc) in their glove.
On the whistle, players take off through the obstacle course and place their team object on the Tic Tac Toe board. After placing their object, players race back to their line to tag the next player who then takes off, completes the skating route, and then places their object down. Teams continue to race and play a game of Tic Tac Toe until one team has won.

Double Goals Game - Royal Road
Double Goals Game - Royal Road is a fun and competitive 3 vs. 3 small area game that allows players to score goals by passing through the gates, or scoring on a goalie. The gates in this version are set up in the "Royal Road," the area in the middle of the ice in front of the net. This setup allows for players to shoot quickly after a pass and go for 2 point plays!
Setup
- Set up two nets in a zone (as pictured in the diagram).
- Set up two "gates" in the royal road (the middle of the ice as pictured in the diagram) with cones or tires.
- Split up the teams and play 3 vs. 3 with 2 goalies. The game can be modified to be 2v2, 3v3, or 4v4.
- Keep score! Teams can score 1 point if they pass through a gate, and 1 point if they score a goal.
- Encourage 2 point plays, which would be a pass through the gate, followed by a quick shot on net.
- Cheer! Players at the blueline should cheer on their teammates and help keep score.
Coaching Points
- Keep Your Head Up: This game is all about awareness. The offense should look to score in different ways and the defense needs to be aware of the gates in the royal road.
- Don't Cheat: Defense should not stand right in the middle of the gate, and goalies should not only look for the pass to come. If the defense or goalies are cheating to block a pass, the player with the puck should fire a shot on net!
- Be Deceptive: Players with the puck on a rush should use deception to keep the defense and goalies guessing if they will pass or shoot.
- Communicate With Your Teammates: This is a fast-paced game and important for teammates to communicate with each other.
- Jump To Space: Offensive players need to work on jumping to open ice to be a passing or shooting option for their teammates.
- Keep Stick On Ice: Defense can block passes and angle with their stick on the ice, while offensive players can give teammates a target to pass to.
Variations
- Game can be setup to be 2v2, 3v3, 4v4 for cross-ice. Can also modify this to be a full 5 v 5 ice game.
- Can give different values for the goals (passing through a gate, skating through a gate, and scoring a goal are all ways to score points). For example you could give 1 point for a pass through a gate and 2 points for a goal.
- Can make the gates larger for beginner players and smaller for higher skilled players.
- Can use washable markers as gate markers on the ice if you do not want the tires or cones getting in the way.
- Can place the gates in different areas of the zone. View Double Goals Game with the gates in the middle of the zone.
Related Content
You can run 2 groups at once on here if needed.